SETUP assist

WLED Software Setup

The WLED color wheel interface open on a laptop and on a phone

Presets can be used to save your favorite light configurations to apply later! You can compare them to the “scenes” feature present in some other smart devices.

New version (0.11+)

Overview

WLED 0.11.0 contains a major overhaul of presets, storing them in a /presets.json file in an internal filesystem.
This enables many new features, you can now have up to 250 presets and each of them can save all segments which are set up!
Speaking of segments, the maximum number has been increased to 12 on ESP8266 and 16 on ESP32!
Presets can now also contain both HTTP and JSON API commands, replacing the previous Macro functionality.
Each preset can be named, so you’ll be able to access it more easily!

How to use

The new preset system is quite a bit more advanced than the previous one, thus it is likely not as self-explanatory to use.
Here you can find what each setting does and how to make best use of it!

“Create Preset” button
Use this to save the current state as a permanent preset, or to add a new API macro.

Preset name
Enter a nice name for your preset here. I would recommend putting something short, but to the point here, like Epic fireworks or Slow fade.
All special characters and emoji are permitted (however, there must not be more than 6 consecutive whitespaces)
If you leave this empty, you’ll get a name based on the preset ID number, like Preset 16.

Quick load label
You can optionally add a short label up to 2 characters or 1 emoji long.
It will show up in a small circle on top of the preset list for extra quick access without scrolling!
I recommend using this for the presets you truly love.

Use current state/Overwrite with state
This is enabled by default when adding a new preset and disabled when editing an existing preset.
When enabled, it will write the current segment config, including all colors and effect, to the preset.
When disabled, it will instead give you a textfield to enter a custom API command or show you the command currently saved.

Include brightness
If disabled, the brightness value is not included in the preset. This can be useful e.g. when you want to control the brightness manually and want the preset to only set the effect.

Save segment bounds
This is an important one. Make sure it is enabled for your boot preset, so that your segment config is properly restored on boot!
When disabled, the segment start and stop LEDs are not included in the preset. This can be useful if you plan to make changes to your segment setup and don’t want your presets to always reset it to the point it was when the preset was saved.

API command
This accepts any HTTP or JSON API command! (only visible if the current state checkbox is unchecked)
It replaces the previous macro functionality.
If you know your JSON, you can even create playlists of other presets!
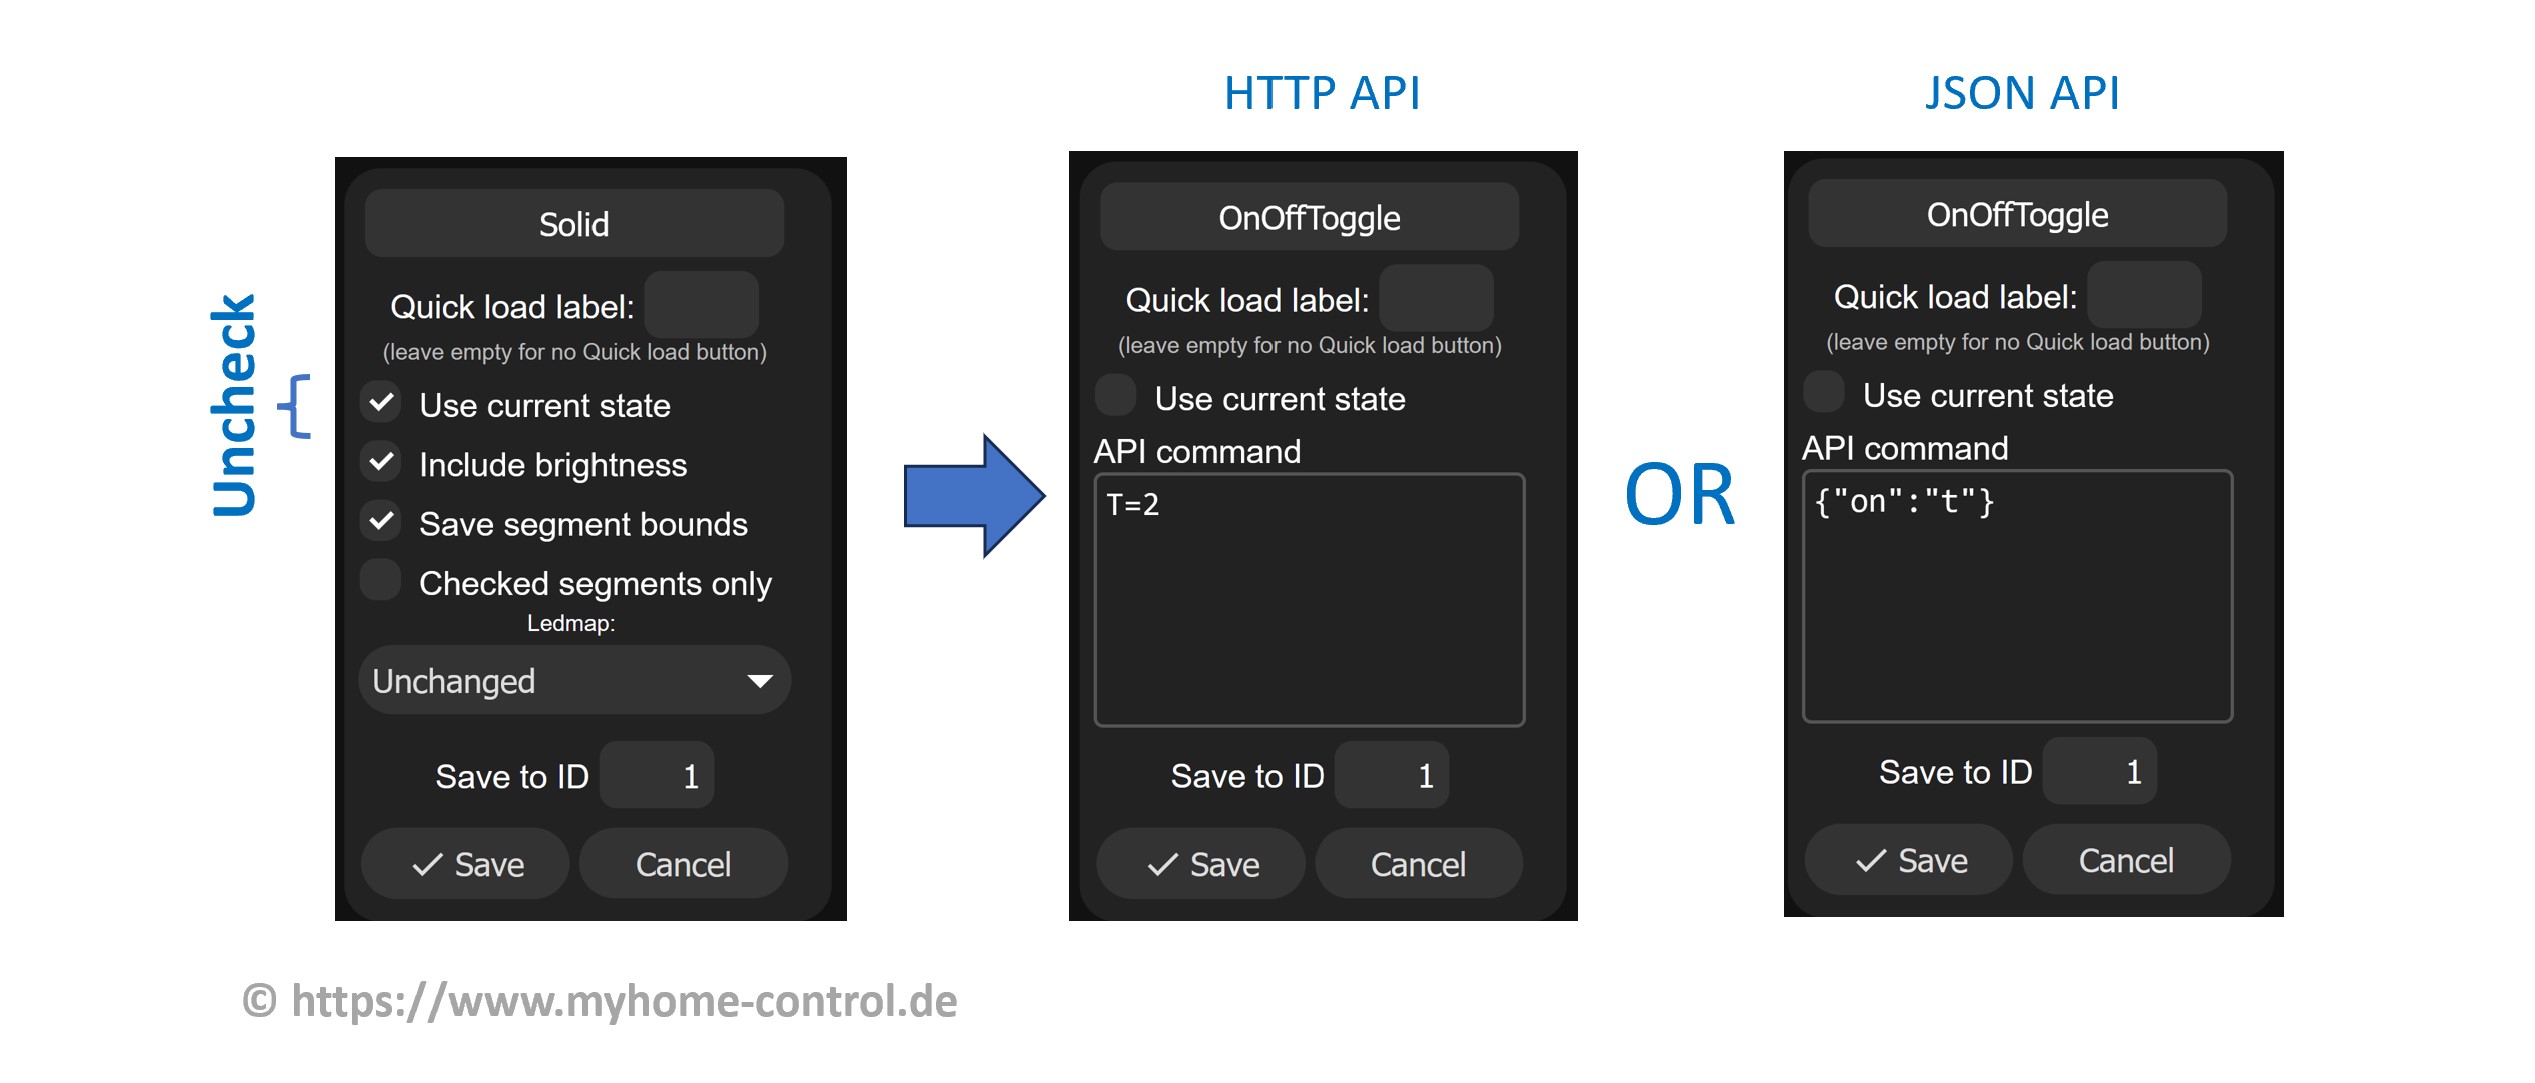
Preset API Example

Some basic examples of API commands:

HTTP API JSON API Description
T=2 {“on”:”t”} Switch between on and off state (toggle). So when LEDs are off, they turn on and vice versa.
T=1 {“on”:true} The LEDs turn on (or no change if they were already on)
T=0 {“on”:false} The LEDs are switched off (or no change if they were already off)
n.a. {“on”:true, “tt”:0} The LEDs are switched on, the LEDs light up immediately without slowly dimming, regardless of the global setting „Transition“.
A=128 {“bri”: 128} The brightness is set to 50%. Minimum value is 0, maximum value (100%) is 255. Therefore 128 means the brightness of 50%
A=~10 {“bri”:”~10″} The brightness is increased by 10. So if this was 100 before, it will be 110.
A=~-20 {“bri”:”~-10″} The brightness is decreased by 20. So if this was 100 before, it will be 80.
R=255&G=0&B=0 {“seg”:[{“col”:[[255,0,0]]}]} The color of LEDs is set to red
R=0&G=255&B=0&A=128&FX=0 {“seg”:[{“fx”:0, “col”:[[0,255,0]]}], “bri”:128} The color of LEDs is set to green, brightness to 50% (value 128) and effect to solid (FX=0)
P1=1&P2=3&PL=~ {“ps”:”1~ 3~”} Iterate between presets with IDs 1 to 3: When called up, the next preset is called up and so on in cycle: 1->2->3->1->2->3->1->…

Save to ID
This is the ID the preset will be saved to.
When creating a new preset, you likely won’t have to change it as the lowest unused ID will be chosen automatically.
If you change the ID on an existing preset and save, you can copy it to the new ID – change the name though.

Save and Delete buttons
Now these are self-explanatory, but I said I’d cover each point :)

ID
This is the number you’ll want to use to apply this preset from a timed macro or automation!

A note on performance

This new preset system is quite fast where it matters, reading the presets.
Applying a preset will typically take less than a tenth of a second.

However, due to a design choice of the LittleFS filesystem used by WLED, random writes to the preset file are very resource intensive.
This means that while updating your presets, you might notice your light freezing and becoming unresponsive for up to a few seconds.
Adding new presets is usually very fast, those performance issues will occur once you delete/edit/overwrite older presets and your preset file becomes very large, or when adding presets after deleting older ones.

I’m looking into ways to mitigate this situation as soon as possible! Meanwhile, to keep things snappy, I would recommend not having more than 50-ish single segment or a dozen of multi-segment presets.

What about my cool presets from earlier versions?

Don’t worry, they (as well as your settings) will be automatically imported to the new system!
And if you ever need to downgrade to v0.10 for some reason, they will still be there (although any changes made in v0.11 won’t be applied)

Obtaining preset list

Obtaining the preset list is possible with the /presets.json file Seeing the name of the current preset with the API only is not possible, you can only obtain its ID. Then you’d need some code to match it with the entries from presets.json (this is also what the UI does). See section “Backing up/restoring presets”.

Saving named presets

Save a named preset with {"psave":<preset number here>;"n":"Preset name","ib":true,"sb":true}

Backing up/restoring presets

To backup all presets, go to [WLED-IP]/edit (OTA lock must be off), right click the presets.json file and download!
To restore, use the Choose file and Upload buttons.

Applying presets at a certain time of day

Tip

If you want to create a preset that turns on the light to the last effect displayed, uncheck Use current state and enter T=1 into the API Command field.

WLED supports schedules – that is, applying presets at a certain time automatically.
Here is a simple guide to get it set up quickly!

  • Creates the preset(s) you want to load at specific time(s)
  • Note the preset ID – the small gray number to the left of the preset name (or, in the bottom of the preset menu)
  • Go to the Time & Macros section in the WLED settings.
  • Make sure the time displayed is correct and accurate. It is highly recommended to enable NTP for a reliable schedule. Do not forget to set the correct timezone. If applicable, daylight saving time is handled automatically.
  • Scroll down to Time-controlled presets. There are 8 different timer slots available.
  • Enter the hour, minute, and weekdays you want the preset to activate. In the Preset column, enter the preset ID you noted earlier. -Hours are measured with the 24-hour clock, where midnight is 0:00. Entering “24” will instead activate the preset hourly.
  • Save the settings page! You have successfully set up a schedule :)

Note

This only applies the preset at the start of the specified minute. If you set up two presets, one to turn on the light at 7 and another to turn it off at 8, if WLED is booted at 7:30, the light will not turn on. This should not be an issue in most applications.

Applying presets at sunrise and sunset

Applying a preset at sunrise and/or sunset is also supported, the last two timed preset slots are used for this.
To calculate the times, WLED needs your location. This is possible with the “Get Location” button in Time & Macro settings if accessed via a browser. If you are using the WLED app, you will need to open locate.wled.me in your browser and copy the coordinates over to the settings page manually.
With the Minutes input field, you may specify an offset of up to 59 minutes before or 59 minutes after the actual sunrise/set time.

Location

Sunrise and sunset calculation do not work if you live in the polar circles (latitude >66.6N or >66.6S).

Earlier versions (up to 0.10)

There are 16 preset slots in total. In 0.9.0, the last preset (16) is capable of saving the entire segment configuration. All other presets only save a single segment (main segment, the first one by default) and restore that preset to all selected segments.

In the Favorites tab, the number buttons from 1-16 are the different save slots. Find a config you like, then toggle Saving mode on and click on a number to save the preset to that slot. If Saving mode is toggled off, you can restore presets with a single click.

Preset cycle (up to 0.12.1)

With this feature, you can create an animation by automatically swapping between presets within a specified range. Keep in mind that any changes you make to effects/colors will be overridden once the system applies the next preset.

If you want to start the preset cycle on boot, go to LED settings and tick “Save current preset cycle configuration as boot default

To modify the duration of the preset cycle, ensure the preset cycle box is unchecked before entering a new time value. Once updated, the preset cycle can be enabled again”

Playlists supersede Preset cycle in 0.13.

Some effects can be overlaid on the background of another effect. To use overlay, set up segments with overlapping pixels. The overlay effect must be playing on the segment with the higher id. If the Overlay option is checked, the background will not be painted and the effect from the lower segment will be displayed.

To aid in showing where colors vs palettes are used, all effects are rendered with the Party palette 

and the colors:
 Primary (Fx)
 (or black) Secondary (Bg)
 Tertiary (Cs).
For 2D effects the background (secondary) color is set to black.


ID Effect Description Flags Colors Parms
186 Akemi The WLED mascot rocking to your tunes.
▦ ♫ Head palette, Arms & Legs, Eyes & Mouth Color speed, Dance
27 Android Section of varying length running
⋮ 🎨 Fx, Bg Speed, Width
38 Aurora Simulation of the Aurora Borealis
⋮ 🎨 1, 2, 3 Speed, Intensity
183 Black Hole Colorful dots orbiting a white black hole.
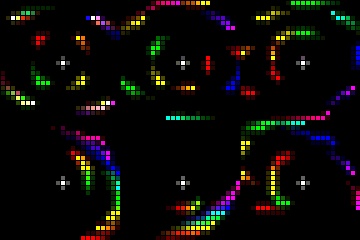
▦ 🎨 Fx Fade rate, Outer Y freq., Outer X freq., Inner X freq., Inner Y freq., Solid
115 Blends Blends random colors across palette
⋮ 🎨 Shift speed, Blend speed
1 Blink Blinks between primary and secondary color

⋮ 🎨 Fx, Bg Speed, Duty cycle
26 Blink Rainbow Same as blink, cycles through the rainbow

⋮ 🎨 Fx, Bg Frequency, Blink duration
121 Blobs No really, they are blobs.
▦ 🎨 Fx Speed, # blobs, Blur
163 Blurz Flash an fftResult bin per frame and then blur/fade.
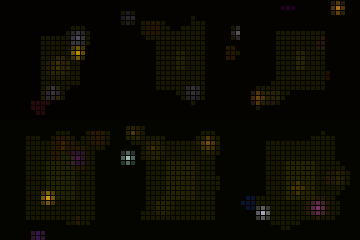
⋮ ♫ 🎨 Fx, Color mix Fade rate, Blur
91 Bouncing Balls Bouncing ball effect
⋮ 🎨 Fx, Bg, Cs Gravity, # of balls, Overlay
68 Bpm Pulses moving back and forth on palette

⋮ 🎨 Fx Speed
2 Breathe Fades between primary and secondary color

⋮ 🎨 Fx, Bg Speed
88 Candle Flicker resembling a candle flame
⋮ 🎨 Fx, Bg Speed, Intensity
102 Candle Multi Like candle effect, but each LED has it’s own flicker pattern

⋮ 🎨 Fx, Bg Speed, Intensity
28 Chase 2 LEDs in primary color running on secondary

⋮ 🎨 Fx, Bg, Cs Speed, Width
37 Chase 2 Pattern of n LEDs primary and n LEDs secondary moves along the strip

⋮ 🎨 Fx, Bg Speed, Width
54 Chase 3 Like Chase, but with 3 colors
⋮ 🎨 1, 2, 3 Speed, Size
31 Chase Flash 2 LEDs flash in secondary color while the rest is lit in primary. The flashing LEDs wander from start to end

⋮ 🎨 Bg, Fx Speed
32 Chase Flash Rnd Like Chase Flash, but the 2 LEDs flash in random colors and leaves a random color behind

⋮ 🎨 Fx, Bg Speed
30 Chase Rainbow Like 28 but leaves trail of rainbow
⋮ 🎨 Fx, Bg Speed, Width
29 Chase Random Like Chase but leaves trail of random color

⋮ 🎨 Fx, Cs Speed, Width
111 Chunchun Birds flying in a circle formation
⋮ 🎨 Fx, Bg Speed, Gap size
167 Colored Bursts Rotating rays of color.
▦ 🎨 Speed, # of lines, Blur, Gradient, Dots
34 Colorful Shifting Red-Amber-Green-Blue pattern
⋮ 🎨 1, 2, 3 Speed, Saturation
8 Colorloop Cycle all LEDs through the rainbow colors

⋮ 🎨 Speed, Saturation
74 Colortwinkles LEDs light up randomly in random colors and fade off again

⋮ 🎨 Fade speed, Spawn speed
67 Colorwaves Like Pride 2015, but uses palettes
⋮ 🎨 Fx Speed, Hue
119 Crazy Bees Bees darting from flower to flower.
▦ Speed, Blur
159 DJ Light An effect emanating from the center to the edges.

⋮ ♫ Speed
152 DNA A very cool DNA like pattern.
▦ 🎨 Scroll speed, Blur
182 DNA Spiral Spiraling DNA pattern
▦ 🎨 Scroll speed, Y frequency
112 Dancing Shadows Moving spotlights
⋮ 🎨 Fx Speed, # of shadows
18 Dissolve Fills LEDs with primary in random order, then off again

⋮ 🎨 Fx, Bg Repeat speed, Dissolve speed, Random
19 Dissolve Rnd Fills LEDs with random colors in random order, then off again

⋮ 🎨 Bg Repeat speed, Dissolve speed
124 Distortion Waves Distorted sine waves with a psychedelic flair.
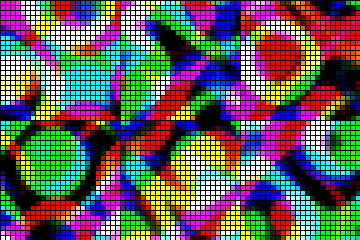
▦ Speed, Scale
164 Drift A rotating kaleidoscope.
▦ 🎨 Rotation speed, Blur amount
123 Drift Rose Spinning arms that adds and removes nodes as it winds and unwinds.

▦ Fade, Blur
96 Drip Water dripping effect
⋮ 🎨 Fx, Bg Gravity, # of drips, Overlay
7 Dynamic Sets each LED to a random color
⋮ 🎨 Speed, Intensity, Smooth
117 Dynamic Smooth Like Dynamic, but with smooth palette blends

⋮ 🎨 Speed, Intensity
12 Fade Fades smoothly between primary and secondary color

⋮ 🎨 Fx, Bg Speed
49 Fairy Inspired by twinkle style Christmas lights.

⋮ 🎨 Fx, Bg Speed, # of flashers
51 Fairytwinkle Like Colortwinkle, but starting from all lit

⋮ 🎨 Fx, Bg Speed, Intensity
69 Fill Noise Noise pattern
⋮ 🎨 Fx Speed
66 Fire 2012 Simulates flickering fire in red and yellow
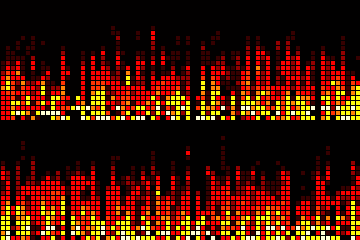
⋮ 🎨 Cooling, Spark rate, Boost
45 Fire Flicker LEDs randomly flickering
⋮ 🎨 Fx Speed, Intensity
149 Firenoise Using Perlin Noise for fire.
▦ 🎨 X scale, Y scale
42 Fireworks Random color blobs light up, then fade again
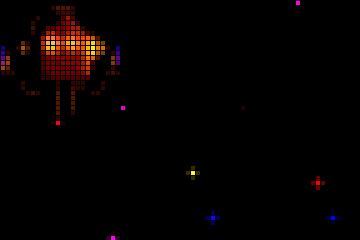
⋮ ▦ 🎨 Fx, Bg Frequency
90 Fireworks 1D one dimension fireworks with flare
⋮ ▦ 🎨 Fx, Bg Gravity, Firing side
89 Fireworks Starburst Exploding multicolor fireworks
⋮ 🎨 Bg Chance, Fragments, Overlay
110 Flow Blend of palette and spot effects
⋮ 🎨 Speed, Zones
179 Flow Stripe Strip with rotating colours.
⋮ Hue speed, Effect speed
155 Freqmap Map the loudest frequency throughout the length of the LED’s.

⋮ ♫ 🎨 Fx, Bg Fade rate, Starting color
138 Freqmatrix The temporal tail for this animation starts at the beginning of the Segment rather than in the center of the segment.

⋮ ♫ Speed, Sound effect, Low bin, High bin, Sensivity
141 Freqpixels Random pixels coloured by frequency.
⋮ ♫ Fade rate, Starting color and # of pixels
137 Freqwave Maps the major frequencies from the incoming signal to colors in the HSV color space.

⋮ ♫ Speed, Sound effect, Low bin, High bin, Pre-amp
177 Frizzles Moving patterns.
▦ 🎨 X frequency, Y frequency, Blur
160 Funky Plank A 2D wall of reactivity running from bottom to top
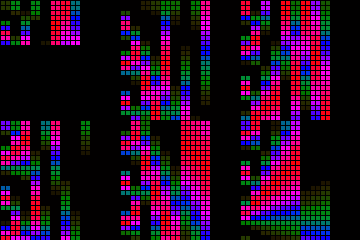
▦ ♫ Scroll speed, # of bands
139 GEQ A 16×16 graphic equalizer.
▦ ♫ 🎨 Fx, Peaks Fade speed, Ripple decay, # of bands, Color bars
172 Game Of Life Scrolling game of life.
▦ 🎨 Fx, Bg Speed
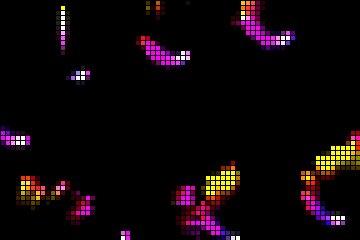
120 Ghost Rider Color changing ghost riding a kite… in a tornado.
▦ 🎨 Fade rate, Blur
87 Glitter Rainbow with white sparkles
⋮ 🎨 1, 2, Glitter color Speed, Intensity, Overlay
46 Gradient Moves a saturation gradient of the primary color along the strip

⋮ 🎨 Fx, Bg Speed, Spread
156 Gravcenter Volume reactive vu-meter from center with gravity and perlin noise.

⋮ ♪ 🎨 Fx, Bg Rate of fall, Sensitivity
157 Gravcentric Volume reactive vu-meter from center with gravity. Volume provides index to (time rotating) palette colour.

⋮ ♪ 🎨 Fx, Bg Rate of fall, Sensitivity
158 Gravfreq VU Meter from center. Log of frequency is index to center colour.

⋮ ♫ 🎨 Fx, Bg Rate of fall, Sensivity
132 Gravimeter Volume reactive vu-meter with gravity and perlin noise.

⋮ ♪ 🎨 Fx, Bg Rate of fall, Sensitivity
82 Halloween Eyes One Pair of blinking eyes at random intervals along strip

⋮ ▦ 🎨 Fx, Bg Duration, Eye fade time, Overlay
100 Heartbeat led strip pulsing rhythm similar to a heart beat

⋮ 🎨 Fx, Bg Speed, Intensity
180 Hiphotic A moving plasma.
▦ 🎨 Fx X scale, Y scale, Speed
58 ICU Two “eyes” running on opposite sides of the strip

⋮ 🎨 Fx, Bg Speed, Intensity, Overlay
64 Juggle Eight colored dots running, leaving trails

⋮ 🎨 Speed, Trail
130 Juggles Juggling balls.
⋮ ♪ 🎨 Fx, Bg Speed, # of balls
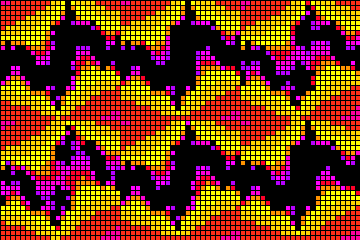
168 Julia Animated Julia set fractal named after mathematician Gaston Julia.
▦ 🎨 Fx Max iterations per pixel, X center, Y center, Area size
75 Lake Calm palette waving
⋮ 🎨 Fx Speed
41 Lighthouse Dot moves from start to end, leaving behind a fading trail

⋮ 🎨 Fx, Bg Speed, Fade rate
57 Lightning Short random white strobe similar to a lightning bolt

⋮ 🎨 Fx, Bg Speed, Intensity, Overlay
176 Lissajous A frequency based Lissajous pattern.
▦ 🎨 Fx X frequency, Fade rate, Speed
47 Loading Moves a sawtooth pattern along the strip

⋮ 🎨 Fx, Bg Speed, Fade
131 Matripix Similar to Matrix.
⋮ ♪ 🎨 Fx, Bg Speed, Brightness
153 Matrix The Matrix, on a 2D matrix.
▦ Spawn, Trail Speed, Spawning rate, Trail, Custom color
154 Metaballs A cool plasma type effect.
▦ 🎨 Speed
76 Meteor The primary color creates a trail of randomly decaying color

⋮ 🎨 Fx Speed, Trail length
77 Meteor Smooth Smoothly animated meteor
⋮ 🎨 Fx Speed, Trail length
135 Midnoise Perlin noise emanating from center.
⋮ ♪ 🎨 Fx, Bg Fade rate, Max. length
59 Multi Comet Like Scanner, but creates multiple trails

⋮
70 Noise 1 Fast Noise shift pattern
⋮ 🎨 Fx Speed
71 Noise 2 Fast Noise shift pattern
⋮ 🎨 Fx Speed
72 Noise 3 Noise shift pattern
⋮ 🎨 Fx Speed
73 Noise 4 Noise sparkle pattern
⋮ 🎨 Fx Speed
107 Noise Pal Peaceful noise that’s slow and with gradually changing palettes

⋮ 🎨 Speed, Scale
146 Noise2D ▦ 🎨 Speed, Scale
143 Noisefire A perlin noise based volume reactive fire routine.

⋮ ♪ Speed, Intensity
136 Noisemeter Volume reactive vu-meter.
⋮ ♪ 🎨 Fx, Bg Fade rate, Width
145 Noisemove Using perlin noise as movement for different frequency bins.

⋮ ♫ 🎨 Fx, Bg Speed of perlin movement, Fade rate
126 Octopus A cephalopod stuck in a whirlpool.
▦ 🎨 Speed, Offset X, Offset Y, Legs
62 Oscillate Areas of primary and secondary colors move between opposite ends, combining colors where they touch

⋮
101 Pacifica Gentle ocean waves
⋮ 🎨 Speed, Angle
65 Palette Running color palette
⋮ 🎨 Cycle speed
98 Percent Lights up a percentage of segment
⋮ 🎨 Fx, Bg % of fill, One color
147 Perlin Move Using Perlin Noise for movement.
⋮ 🎨 Fx, Bg Speed, # of pixels, Fade rate
105 Phased Sine waves (in sourcecode)
⋮ 🎨 Fx, Bg Speed, Intensity
109 Phased Noise Noisy sine waves
⋮ 🎨 Fx, Bg Speed, Intensity
128 Pixels Random pixels
⋮ ♪ 🎨 Fx, Bg Fade rate, # of pixels
129 Pixelwave Pixels emanating from center
⋮ ♪ 🎨 Fx, Bg Speed, Sensitivity
97 Plasma Plasma lamp
⋮ 🎨 Fx Phase, Intensity
178 Plasma Ball A ball of plasma.
▦ 🎨 Speed, Fade, Blur
133 Plasmoid Sine wave based plasma.
⋮ ♪ 🎨 Fx, Bg Phase, # of pixels
174 Polar Lights The northern lights.
▦ Speed, Scale
95 Popcorn popping kernels
⋮ 🎨 Fx, Bg, Cs Speed, Intensity, Overlay
63 Pride 2015 Rainbow cycling with brightness variation

⋮ Speed
144 Puddlepeak Blast coloured puddles randomly up and down the strand with the ‘beat’.

⋮ ♪ 🎨 Fx, Bg Fade rate, Puddle size, Select bin, Volume (min)
134 Puddles Blast coloured puddles based on volume.

⋮ ♪ 🎨 Fx, Bg Fade rate, Puddle size
162 Pulser Travelling waves.
▦ 🎨 Speed, Blur
78 Railway Shows primary and secondary color on alternating LEDs. All LEDs fade to their opposite color and back again

⋮ 🎨 1, 2 Speed, Smoothness
43 Rain Like Fireworks, but the blobs move
⋮ ▦ 🎨 Fx, Bg Speed, Spawning rate
9 Rainbow Displays rainbow colors along the whole strip

⋮ 🎨 Speed, Size
33 Rainbow Runner Like Chase, but the 2 LEDs light up in rainbow colors and leave a primary color trail

⋮ 🎨 Bg Speed, Size
5 Random Colors Applies a new random color to all LEDs
⋮ 🎨 Speed, Fade time
79 Ripple Effect resembling random water ripples
⋮ ▦ 🎨 Bg Speed, Wave #, Overlay
148 Ripple Peak Peak detection triggers ripples.
⋮ ♪ 🎨 Fx, Bg Fade rate, Max # of ripples, Select bin, Volume (min)
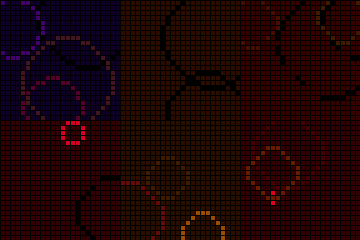
99 Ripple Rainbow Like ripple, but with a dimly lit changing background
⋮ ▦ 🎨 Speed, Wave #
185 Rocktaves Colours the same for each note between octaves, with sine wave going back and forth.

⋮ ♫ 🎨 Fx, Bg
15 Running Sine Waves scrolling
⋮ 🎨 Fx, Bg Speed, Wave width
52 Running Dual Sine waves in both directions
⋮ 🎨 L, Bg, R Speed, Wave width
16 Saw Sawtooth Waves scrolling
⋮ 🎨 Fx, Bg Speed, Width
10 Scan A single primary colored light wanders between start and end

⋮ 🎨 Fx, Bg, Cs Speed, # of dots, Overlay
11 Scan Dual Same as Scan but uses two lights starting at both ends

⋮ 🎨 Fx, Bg, Cs Speed, # of dots, Overlay
40 Scanner Dot moves between ends, leaving behind a fading trail

⋮ 🎨 Fx, Bg Speed, Fade rate
60 Scanner Dual Like Scanner, but with two dots running on opposite sides

⋮ 🎨 Fx, Bg, Cs Speed, Fade rate
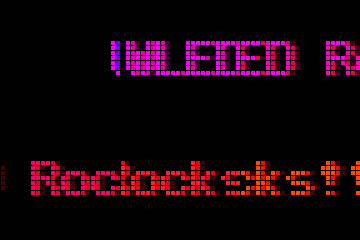
122 Scrolling Text Edit segment name to set text (variables #DATE, #TIME, #DDMM, #MMDD, #HHMM, #HH, #MM; suffix with 0 to have leading 0s, i.e. #DATE0). Use segment grouping to increase text size on a large matrix.
▦ 🎨 Fx, Bg, Gradient Speed, Y Offset, Trail, Font size, Gradient, Overlay, 0
181 Sindots Dots revolving in a circle while the ‘camera’
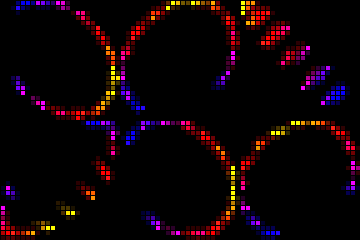
▦ 🎨 Speed, Dot distance, Fade rate, Blur
108 Sine Controllable sine waves
⋮
92 Sinelon Fastled sinusoidal moving eye
⋮ 🎨 Fx, Bg, Cs Speed, Trail
93 Sinelon Dual Sinelon from both directions
⋮ 🎨 Fx, Bg, Cs Speed, Trail
94 Sinelon Rainbow Sinelon in rainbow colours
⋮ 🎨 Cs Speed, Trail
125 Soap Like soap bubbles, but lasts longer.
▦ 🎨 Speed, Smoothness
0 Solid Solid primary color on all LEDs
⋮
103 Solid Glitter Like Glitter, but with solid color background

⋮ Bg, Glitter color Intensity
83 Solid Pattern Speed sets number of LEDs on, intensity sets off

⋮ 🎨 Fg, Bg Fg size, Bg size
84 Solid Pattern Tri Solid Pattern with three colors
⋮ 1, 2, 3 Size
118 Spaceships Circling ships with fading trails. Homage to 80s spaceship shooter games.
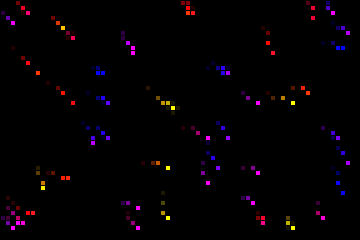
▦ 🎨 Speed, Blur
20 Sparkle Single random LEDs light up in the primary color for a short time, secondary is background

⋮ 🎨 Fx, Bg Speed, Overlay
21 Sparkle Dark All LEDs are lit in the primary color, single random LEDs turn off for a short time

⋮ 🎨 Bg, Fx Speed, Intensity, Overlay
22 Sparkle+ All LEDs are lit in the primary color, multiple random LEDs turn off for a short time

⋮ 🎨 Bg, Fx Speed, Intensity, Overlay
85 Spots Solid lights with even distance
⋮ 🎨 Fx, Bg Spread, Width, Overlay
86 Spots Fade Spots, getting bigger and smaller
⋮ 🎨 Fx, Bg Spread, Width, Overlay
150 Squared Swirl Boxes moving around
▦ 🎨 Blur
39 Stream Flush bands random hues along the string

⋮ 🎨 Speed, Zone size
61 Stream 2 Flush random hues along the string
⋮ Speed
23 Strobe All LEDs are lit in the secondary color, all LEDs flash in a single short burst in primary color

⋮ 🎨 Fx, Bg Speed
25 Strobe Mega All LEDs are lit in the secondary color, all LEDs flash in several short bursts in primary color

⋮ 🎨 Fx, Bg Speed, Intensity
24 Strobe Rainbow Same as strobe, cycles through the rainbow

⋮ 🎨 Bg Speed
166 Sun Radiation The sun! Doesn’t support segments.
▦ Variance, Brightness
104 Sunrise Simulates a gradual sunrise or sunset. Speed sets: 0 – static sun, 1 – 60: sunrise time in minutes,60 – 120: sunset time in minutes – 60, above: “breathing” rise and set

⋮ 🎨 Time [min], Width
6 Sweep Switches between primary and secondary, switching LEDs one by one, start to end to start

⋮ 🎨 Fx, Bg Speed, Intensity
36 Sweep Random Like Sweep, but uses random colors
⋮ 🎨 Speed
175 Swirl Several blurred circles. Looks good with pink plasma palette. Supports AGC.

▦ ♪ 🎨 Bg Swirl Speed, Sensitivity, Blur
116 TV Simulator TV light spill simulation
⋮ Speed, Intensity
173 Tartan Plaid pattern of horizontal and vertical bands. Makes a great kilt.
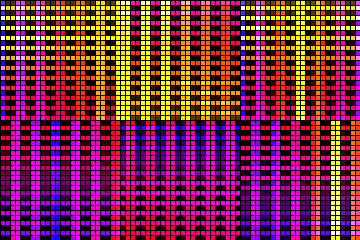
▦ 🎨 X scale, Y scale, Sharpness
44 Tetrix Falling blocks stack
⋮ 🎨 Fx, Bg Speed, Width, One color
13 Theater Pattern of one lit and two unlit LEDs running

⋮ 🎨 Fx, Bg Speed, Gap size
14 Theater Rainbow Same as Theater but uses colors of the rainbow

⋮ 🎨 Bg Speed, Gap size
35 Traffic Light Emulates a traffic light
⋮ 🎨 Bg Speed, US style
56 Tri Fade Fades the whole strip from primary color to secondary color to off

⋮ 🎨 1, 2, 3 Speed
55 Tri Wipe Like Wipe but turns LEDs off as “third color”

⋮ 🎨 1, 2, 3 Speed
17 Twinkle Random LEDs light up in the primary color with secondary as background

⋮ 🎨 Fx, Bg Speed, Intensity
81 Twinklecat Twinkling with fast in / slow out
⋮ 🎨 Speed, Twinkle rate
80 Twinklefox FastLED gentle twinkling with slow fade in/out

⋮ 🎨 Speed, Twinkle rate
106 Twinkleup Twinkle effect with fade-in
⋮ 🎨 Fx, Bg Speed, Intensity
50 Two Dots Two areas sweeping
⋮ 🎨 1, 2, Bg Speed, Dot size, Overlay
113 Washing Machine Spins, slows, reverses directions
⋮ 🎨 Speed, Intensity
140 Waterfall A volume AND FFT version of a Waterfall that has ‘beat’ support.

⋮ ♫ 🎨 Fx, Bg Speed, Adjust color, Select bin, Volume (min)
165 Waverly Noise waves with some sound.
▦ ♪ 🎨 Amplification, Sensitivity
184 Wavesins Beat waves and phase shifting. Looks OK in 2D’ish as well.

⋮ 🎨 Fx Speed, Brightness variation, Starting color, Range of colors, Color variation
127 Waving Cell If a bunch of eucaryotes went to a sports stadium and did the wave, it would look exactly like this.
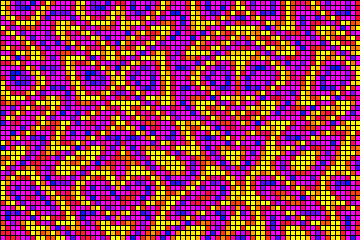
▦ 🎨 Speed, Amplitude 1, Amplitude 2, Amplitude 3
3 Wipe Switches between primary and secondary, switching LEDs one by one, start to end

⋮ 🎨 Fx, Bg Speed, Intensity
4 Wipe Random Same as Wipe, but uses random colors
⋮ 🎨 Speed


Beginning in 0.14 up to 10 Custom Palletes can be uploaded.

ID Name Description
0 Default The palette is automatically selected depending on the effect. For most effects, this is the primary color

2 Color 1 A palette consisting only of the primary color

4 Color Gradient A palette which is a mixture of all segment colors

3 Colors 1&2 Consists of the primary and secondary color

5 Colors Only Contains primary, secondary and tertiary colors

1 Random Cycle The palette changes to a random one every few seconds. Subject to change

18 Analogous Red running on blue
46 April Night Dark blue background with colorful snowflakes

63 Aqua Flash Aqua gradient with a flash of yellow and white

51 Atlantica Greens & Blues of the ocean
50 Aurora Greens on dark blue
55 Aurora 2 Aurora with some pinks & blue
39 Autumn Three white fields surrounded by yellow and dim red

22 Beach Different shades of light blue
26 Beech Teal and yellow gradient fading out
67 Blink Red Dark blue to dark red gradient with burst of purple

15 Breeze Teal colors with varying brightness
48 C9 Christmas lights palette. Red – amber – green – blue

52 C9 2 C9 plus yellow
53 C9 New C9, but brighter and with a less purple blue

57 Candy Vivid yellows, magenta, salmon and blues

70 Candy2 Faded gradient of yellow, salmon and blue

7 Cloud Gray-blueish colors
37 Cyane Desaturated pastel colors
24 Departure Greens and white fading out
30 Drywet Blue and yellow gradient
59 Fairy Reaf Bright aqua to purple gradient
35 Fire White, yellow and fading red gradient
10 Forest Yellow and green hues
32 Grintage Yellow fading out
28 Hult White, magenta and teal
29 Hult 64 Teal and yellow hues
36 Icefire Same as Fire, but with blue colors
31 Jul Pastel green and red
25 Landscape Blue, white and green gradient
8 Lava Dark red, yellow and bright white
38 Light Pink Desaturated purple hues
65 Lite Light Faint white and purple
40 Magenta White with magenta and blue
41 Magred Magenta and red hues
9 Ocean Blue, teal and white colors
44 Orange & Teal An Orange – Gray – Teal gradient
47 Orangery Orange and yellow tones
6 Party Rainbow without green hues
20 Pastel Different hues with very little saturation

61 Pink Candy White, pinks and purple
11 Rainbow Every hue
12 Rainbow Bands Rainbow colors with black spots in-between

16 Red & Blue Red running on blue
66 Red Flash Red gradient with burst of white in the center

62 Red Reaf Blue, aqua and red gradient
68 Red Shift Vibrant yellow to blue gradient with magenta, purple and red

69 Red Tide Waves of yellow, orange and red
56 Retro Clown Yellow to purple gradient
33 Rewhi Bright orange on desaturated purple
14 Rivendell Desaturated greens
49 Sakura Pink and rose tones
60 Semi Blue Dark blues with a bright blue burst
27 Sherbet Bright white, pink and mint colors
19 Splash Vibrant pink and magenta
13 Sunset Dark blue with purple, red and yellow hues

21 Sunset 2 Yellow and white running on dim blue
54 Temperature Temperature mapping
34 Tertiary Red, green and blue gradient
45 Tiamat A bright meteor with blue, teal and magenta hues

58 Toxy Reaf Vivid aqua to purple gradient
23 Vintage Warm white running on very dim red
43 Yelblu Blue with a little yellow
64 Yelblu Hot Yellow, red, blue spectrum
17 Yellowout Yellow, fading out
42 Yelmag Magenta and red hues with a yellow

Custom Palettes

As of 0.14, up to 10 custom palettes can be uploaded by the user in JSON files named palette0.json through palette9.json The format closely resembles that of the palettes defined in palettes.h with a position (0-255), red, green, blue for each color. An example of the content would be:

{"palette":[ 
    0, 255,  33,   4, 
   43, 255,  68,  25,
   86, 255,   7,  25,
  127, 255,  82, 103,
  170, 255, 255, 242,
  209,  42, 255, 22,
  255,  87, 255, 65]}


Once a palette[0-9].json file has been created, it can be uploaded to the controller using the /edit page (http://[controller-ip]/edit). The controller must be rebooted (/win&RB) before the newly uploaded palettes will be available. After reboot, the custom palette(s) will be named ~ Custom [0-9] ~ in the Palettes section of the user interface.

💡 Check Out the WLED Forum – Your Hub for Smart Lighting Brilliance!

If you’re into smart lighting, custom effects, or just love geeking out over addressable LEDs, then the WLED Forum needs to be your next stop.

Whether you’re a seasoned installer or just getting started with WLED, the forum is packed with valuable resources, troubleshooting tips, project inspiration, and direct input from the community and developers themselves. It’s the perfect space to ask questions, share your lighting setups, or stay updated on the latest firmware releases and integrations.

From syncing light shows to your favorite music, to making your home glow with intelligent automation—this is where the magic happens. 🎇

👉 Join the conversation now: https://wled.discourse.group/

Let’s light up smarter, together.

Use a WiFi device to connect to the access point WLED[YOUR NAME] using the default password wled1234. You can also just scan this QR code:

WLED[Name] is not showing up!

If you do not see the WLED-AP SSID, the default SSID may have been changed at compile time.

Go to the IP 4.3.2.1 in your browser to control your lights! You should also be able to connect to wled.me if in access point mode (embedded DNS server).

Wifi Setup

To connect your WLED module to your home Wifi:

Click on the Config(gear) icon to edit your WLED module settings and choose “Wifi Setup”.

For most home networks, simply enter your Wifi network’s name and network password. You can also change the mDNS address for your WLED module here.

Click Save & Connect at the bottom of the page.

Reconnect your device to your home’s Wifi network.

Check the device list in your router’s user interface for the IP of the WLED device within your local network. For easy automatic discovery, use the WLED Native app! Have fun with the WLED software!

Connection issues

Compilation issues

LED issues

General questions

My question or solution is not on this page

Installation

What binary should I use?

Please see this page.

I’ve flashed a bin, but i get no response at all

Some users report first erasing the flash (yes, even on a new device) sometimes helps .

Connection issues

Once I attach LEDs, I can’t connect to the ESP anymore!

The gpio2/D4 pin needs to be high (pullup) at powerup time for the controller to boot successfully. If you accidentally connected the strip the wrong way (if it has arrows printed on, make sure they face away from the pin, otherwise pay attention to the DIN printing). Most strips have the 3-pin male JST connector with 3 holes on the input side. Some users have reported troubles booting even with the direction being correct. In that case, please try adding a 3.3 or 4.7kOhms resistor between the data pin and 3v3 pin!

I have entered my WiFi credentials and rebooted, but I can not connect to the module now!

If you did not enter a static IP, the module will automatically obtain a dynamic IP from the router. You can check it in the router configuration or in the settings page, if the Access Point is still enabled. An easier way is to use the WLED Native app which features automatic discovery!

The module once was connected, but I can no longer reach it

First, make sure you can reach the connected WiFi yourself (with another device). See if you can connect to the Access Point, then go to 4.3.2.1/reset. Else, power-cycle the module manually.

The wled-xxx.local address (mDNS) does not work

This only works with Apple devices out of the box. You can install Bonjour to make it work in Windows. For Android there is no convenient way to achieve it, though you can use apps like “Bonjour search” to find the IP. It is highly recommended that you install the WLED Native app, which makes automatic discovery easy!

Is it safe to do a port forwarding to the public internet to control the lights from anywhere?

See this page.

My device is unresponsive or animations lag!

You are probably using too many sync interfaces. Please only enable one of Hue sync, MQTT, or Blynk at a time. For optimal performance, use two devices and sync them via the UDP notifier. Maybe you are also using a very high amount of LEDs. 750 is the recommended maximum. If using E1.31 feature on an ESP32, try “Disabling WiFi Sleep” in the WiFi setup section to reduce lag/stuttering of visual effects.

I’m having a bootloop! (LEDs turn on every ~5seconds)

Please open an issue or message me on Discord to resolve your issue. Most of the time, wiping the flash (Arduino IDE compile setting: Erase flash -> All flash contents) resolves the issue. Unfortunately it will also reset all your settings and presets. You can also try if using a different ESP resolves the issue. If you compiled with lwip version 2, try version 1.4 Higher Bandwidth instead!

Still having connection issues/connection dropping: what more can i check?

Try disabling “Emulate Alexa device” in Sync settings before entering your home Wifi credentials. Check whether mDNS is on or off and toggle it: does it make a difference? Same for ‘NTP’. Same for ‘Sync Send’. Check your router: is your 2.4Ghz on band 1: if not, try it please. If you have the possibility to try another 8266, please try it.

I am running realtime (e.g. E1.31) and not all of my LEDs are driven fluently!

Realtime effect streaming uses a rather large bandwidth as data is transmitted uncompressed. For example, to drive 1000 LEDs at 30 fps, you will need a data rate of 720 kBit/s, which is difficult to achieve with most cheap ESP boards over WiFi. Even if you split the total amount of LEDs across multiple controllers, your WiFi network could become the limiting factor quickly. The best way to ensure a low-latency, reliable, fluid stream when using large quantities of LEDs is to invest in a wired Ethernet ESP32 board like QuinLED-Dig boards with ethernet or the Olimex ESP32-POE.

There is a 9 DMX universe limit by default in WLED. You can raise it in line 240 of const.h (E131_MAX_UNIVERSE_COUNT 9) and compile your own binary, but the performance of 2000 LEDs over WiFi will likely not be good unless you use an Ethernet enabled board.

If Ethernet is not an option, decrease your LED count as far as possible, lower the frame rate in the sending software and make sure the WiFi signal reception of the board is good. Even without Ethernet, a board with an external antenna is significantly better than a PCB antenna board.

Furthermore I suggest using the DDP protocol if available in your sender software (available in xLights). DDP has a smaller packet header and because of the reduced overhead the fluidity of your animations will be a bit better.

Compilation issues

When compiling WLED in VS Code using platformio, I get an error

Try building again. If the error says the wled00.ino.cpp or .sconsign27.db.dblite file could not be found, this often helps. You can also try this!

LED issues

My LEDs don’t turn on at all.

Please make sure you have connected the strip to GPIO2 and it is sufficiently powered.

My LEDs don’t get as bright as they should!

If the brightness slider in the UI is already at maximum, try checking the auto brightness limiter in the LED settings. Set the milliamp limit to slightly below the rating of your power supply. If the LEDs are still too dim or change color towards the end of the strip, there may be a significant voltage drop. Try injecting 5v power at the end or middle of the strip with some appropriate cabling.

My LEDs are unable to be set into an consistent solid color

If the LEDs should be individually addressable, like the SK6812, but instead they only behave as either RED,GREEN OR BlUE pixels (in a row). You might not have enabled (settings -> led preferences) “LEDs are 4-channel type (RGBW)” for an RGBW/RGBWW/RGBNW strip. This behaviour is accompanied by WLED being unable to address all LEDs, if you specify the exact amount of LEDs in the strip.

When I select green, the LEDs turn red!

Depending on the type of LEDs used, Red and Green or other colors might be reversed. You can change the order in LED settings. WS2812B and most related chips use GRB, WS2811 uses RGB in most cases.

My LEDs act funny and flicker randomly

Reason 1

If you use an external 5V power supply for your LEDs, please connect the GND of power supply, LEDs, and ESP. Otherwise, the LEDs can’t read the data signal from the ESP.

Reason 2

The ESP8266 is a 3.3V microcontroller while the WS2812B LED uses 5V. I have personally got away with this in most cases, but you should technically add a level shifter. A string of WS2811 did not work in one case (pure static white). A possible workaround is chaining a single WS2812B pixel in front and checking “Skip first LED” in the settings. My recommended levelshifter is the SN74AHCT125N, also used in the QuinLED Dig-Uno board. If you don’t have a level shifter, you can use this creative workaround.

Reason 3

Your data line can only be so long. Try out with less or thicker wire between your data pin on your controller and the LED strip, or add (see video) some voltage booster (which can make even 40m data wire length work ;-)).

Reason 4

If they don’t flicker, but display funny colors, try switching between RGB/RGBW modes in LED settings.

Not all my LEDs turn on

Reason 1

By default the LED count is set to 30. If you have more and can power them, go to LED settings and increase the LED count! Please also enter the milliamp rating of your 5v power supply for optimal brightness in the field below it. Do not increase the mA number if you power LEDs directly from the 5V pin of the ESP!

See here for maximum recommended LED counts.

Reason 2

An LED in your chain may be broken. Try another strip or removing the first LED that doesn’t light up. Make sure you are in solid effect mode and the LED count is set high enough first!

How to turn off the bright blue onboard LED?

This LED can be very distracting. Unfortunately it can’t easily be disabled as it shares the gpio2/D4 pin with the LED output.
It is turned off together with your LEDs (unless they require Off Refresh to be active)
Currently there are 3 workarounds:

  • Cover the LED
  • Remove the LED permanently (desolder or apply pressure with e.g. a flathead screwdriver)
  • Use a different LEDPIN, although the default is recommended for stable operation

Why is gpio2/D4 the default LED pin?

Although pins D1 and D2 are usually regarded the best GPIO pins to use in an ESP8266 project, D4 is the default in WLED, despite having two major and one minor drawback. The major drawbacks are the permanently lit blue onboard LEDs and the fact that the pin level needs to be high (pullup) at powerup or the controller will not boot. A minor drawback is that the Serial1 bus can not be used, but this is irrelevant in most cases, as the USB/serial converter is connected to the other Serial interface. The reason for using this pin is that it uses UART hardware driving, which increases stability and decreases CPU overhead especially with larger amounts of pixels.

Why can I only use 500 LEDs on the ESP8266 GPIO pin 3?

The problem is the DMA hardware driving method used on (just) that pin. It works well, but uses 4x (!) as much RAM memory as the UART hardware driving on pin 2 and the bitbang driver on all other pins.

What LED strip hardware is supported by WLED?

The compatible chipsets for the color-coding are

  • 1 pin:
  • WS2812B (5V)
  • WS2811 (12V power, with 5V signal)
  • WS2813 (WS2812 with redundant data on 2 wires DI and BI, to resist LEDs failure)
  • WS2815 (like WS2813 but 12V), send 5V signal on BI.
  • BTF2815 (cheaper 12V)
  • SK6813 (redundant like WS2813)
  • SK6812 (can support up to 4 colors, commonly GRBW)
  • SK6805 (3 colors)
  • 2 pins (clock CI and data DI) chips:
  • APA102
  • SK9822
  • WS2801 (uses gpio0 and 2)
  • LPD8806

Beside the digital addressable LED strips the good old analog LED strips are supported, too:

  • 4 pins: RGB
  • 5 pins: RGBW / RGBWW / RGBCW / RGBNW (RGB + one white channel)
  • 6 pins: RGBCT (RGB + 2 white channels) Note: Support is only for Alexa.

General Questions

What does the name WLED mean?

WiFi Lighting Effects Driver. Also it has LED in the name and is similar to the official term for WiFi, WLAN!

What do the WLED version names mean?

WLED version names are Japanese! Here is a nice list of their meanings:

Version Name Kanji Meaning
0.10 Namigai 浪貝 Geoduck (don’t google it!)
0.11.0 Mirai 未来 Future
0.11.1 Fumikiri 踏切 Railroad crossing
0.12 Hikari 光 Light
0.13 Toki 時 Time
0.14 Hoshi 星 Star
0.15 Kōsen 光線 Ray of light
N/A Kuuhaku 空白 Blank

What is the difference between the brightness sliders in the web UI?

There are three brightness slider types in the web UI. The white one in the top bar is the master brightness – it scales down every single color and all effects, palettes and segments by the same factor.

In contrast, the slider underneath the color wheel only applies to the currently selected color and will not affect the brightness of other colors or Palettes. It is recommended to use this slider only if you like a darker version of a color alongside other, brighter colors. It should not be used to control the overall brightness, so it is preferable to leave it on maximum and instead use the master brightness control.

There is a third brightness slider in each Segment panel. This serves the same purpose as master brightness, but limited to that segment. Please note that this does not override the master brightness, but instead is an additional downscaling. (If you set both Master and Segment brightness sliders to 50%, the resulting brightness is 25%)

My Segments are gone after a reboot!

Segments are non-persistant by default. If you want to load your preset at every startup, just do the following:

  • Set your segments up as desired
  • Go into the Favorites tab in the web UI, click the save checkbox and save the config to preset slot number 16
  • In LED settings, set Boot Preset to 16

This will be improved in a future release, so that you will be able to save multiple segment configurations!

What is the difference between the WLED app and the WLED Native app?

The WLED app was the official app developped by the same people that brought you WLED. WLED Native is an initiative by community member Moustachauve to bring an interface that is closer to the native operating system look of your device and some new features.

The official WLED app is now considered legacy. It is not currently maintained and might not receive any future bug fixes.

WLED Native has a few more features available, like a tablet interface for Android and can keep track of changes to the device IP address better.

While WLED Native is not the official app, it is officially endorsed and trusted by the WLED maintainers.

May I sell a product running WLED?

WLED is licensed under the MIT license, thus you are free to use it in any way you wish as long as you retain the copyright notice and accept that I am not to be held liable for anything regarding your use of the software. For product pages, a link to the WLED GitHub repository would be hugely appreciated !

My question or solution is not on this page

Check out the WLED forum!

You can check out and use the WLED Discourse forum.

Look through the Issues

Maybe someone already reported your issue, so everybody supplying support would be grateful if you take some time to search through the existing issues.

If I report a new Issue, what do i need to share?

When you create a ticket, please share:

  • exact controller, maybe a link to the shop you bought it from
  • LED-strip type and amount of LEDs
  • Specifications of your power supply (max. current/voltage)
  • how you wired up all components (a diagram and/or picture often helps)
  • the BIN-file you tried to flash (version and file name) or your IDE version if compiling from source
  • Have you followed the quick start and compile settings at https://docs.wled.me?
  • Has it worked before?
  • Does it works without any LEDs connected? (for instance the controller just connected to your PC over USB)
  • Are you using/trying to use DHCP or static IP?
  • Did you try to use a mobile hotspot instead of your WLAN AP/home wifi?

Depending on the type of LEDs used, Red and Green or other colors might be reversed. You can change the order in LED settings. WS2812B and most related chips use GRB, WS2811 uses RGB in most cases.

My LEDs act funny and flicker randomly

Reason 1

If you use an external 5V power supply for your LEDs, please connect the GND of power supply, LEDs, and ESP. Otherwise, the LEDs can’t read the data signal from the ESP.

Reason 2

The ESP8266 is a 3.3V microcontroller while the WS2812B LED uses 5V. I have personally got away with this in most cases, but you should technically add a level shifter. A string of WS2811 did not work in one case (pure static white). A possible workaround is chaining a single WS2812B pixel in front and checking “Skip first LED” in the settings. My recommended levelshifter is the SN74AHCT125N, also used in the QuinLED Dig-Uno board. If you don’t have a level shifter, you can use this creative workaround.

Reason 3

Your data line can only be so long. Try out with less or thicker wire between your data pin on your controller and the LED strip, or add (see video) some voltage booster (which can make even 40m data wire length work ;-)).

Reason 4

If they don’t flicker, but display funny colors, try switching between RGB/RGBW modes in LED settings.

Not all my LEDs turn on

Reason 1

By default the LED count is set to 30. If you have more and can power them, go to LED settings and increase the LED count! Please also enter the milliamp rating of your 5v power supply for optimal brightness in the field below it. Do not increase the mA number if you power LEDs directly from the 5V pin of the ESP!

See here for maximum recommended LED counts.

Reason 2

An LED in your chain may be broken. Try another strip or removing the first LED that doesn’t light up. Make sure you are in solid effect mode and the LED count is set high enough first!

How to turn off the bright blue onboard LED?

This LED can be very distracting. Unfortunately it can’t easily be disabled as it shares the gpio2/D4 pin with the LED output.
It is turned off together with your LEDs (unless they require Off Refresh to be active)
Currently there are 3 workarounds:

  • Cover the LED
  • Remove the LED permanently (desolder or apply pressure with e.g. a flathead screwdriver)
  • Use a different LEDPIN, although the default is recommended for stable operation

Why is gpio2/D4 the default LED pin?

Although pins D1 and D2 are usually regarded the best GPIO pins to use in an ESP8266 project, D4 is the default in WLED, despite having two major and one minor drawback. The major drawbacks are the permanently lit blue onboard LEDs and the fact that the pin level needs to be high (pullup) at powerup or the controller will not boot. A minor drawback is that the Serial1 bus can not be used, but this is irrelevant in most cases, as the USB/serial converter is connected to the other Serial interface. The reason for using this pin is that it uses UART hardware driving, which increases stability and decreases CPU overhead especially with larger amounts of pixels.

Why can I only use 500 LEDs on the ESP8266 GPIO pin 3?

The problem is the DMA hardware driving method used on (just) that pin. It works well, but uses 4x (!) as much RAM memory as the UART hardware driving on pin 2 and the bitbang driver on all other pins.

What LED strip hardware is supported by WLED?

The compatible chipsets for the color-coding are

  • 1 pin:
  • WS2812B (5V)
  • WS2811 (12V power, with 5V signal)
  • WS2813 (WS2812 with redundant data on 2 wires DI and BI, to resist LEDs failure)
  • WS2815 (like WS2813 but 12V), send 5V signal on BI.
  • BTF2815 (cheaper 12V)
  • SK6813 (redundant like WS2813)
  • SK6812 (can support up to 4 colors, commonly GRBW)
  • SK6805 (3 colors)
  • 2 pins (clock CI and data DI) chips:
  • APA102
  • SK9822
  • WS2801 (uses gpio0 and 2)
  • LPD8806

Beside the digital addressable LED strips the good old analog LED strips are supported, too:

  • 4 pins: RGB
  • 5 pins: RGBW / RGBWW / RGBCW / RGBNW (RGB + one white channel)
  • 6 pins: RGBCT (RGB + 2 white channels) Note: Support is only for Alexa.

General Questions

What does the name WLED mean?

WiFi Lighting Effects Driver. Also it has LED in the name and is similar to the official term for WiFi, WLAN!

What do the WLED version names mean?

WLED version names are Japanese! Here is a nice list of their meanings:

Version Name Kanji Meaning
0.10 Namigai 浪貝 Geoduck (don’t google it!)
0.11.0 Mirai 未来 Future
0.11.1 Fumikiri 踏切 Railroad crossing
0.12 Hikari 光 Light
0.13 Toki 時 Time
0.14 Hoshi 星 Star
0.15 Kōsen 光線 Ray of light
N/A Kuuhaku 空白 Blank

What is the difference between the brightness sliders in the web UI?

There are three brightness slider types in the web UI. The white one in the top bar is the master brightness – it scales down every single color and all effects, palettes and segments by the same factor.

In contrast, the slider underneath the color wheel only applies to the currently selected color and will not affect the brightness of other colors or Palettes. It is recommended to use this slider only if you like a darker version of a color alongside other, brighter colors. It should not be used to control the overall brightness, so it is preferable to leave it on maximum and instead use the master brightness control.

There is a third brightness slider in each Segment panel. This serves the same purpose as master brightness, but limited to that segment. Please note that this does not override the master brightness, but instead is an additional downscaling. (If you set both Master and Segment brightness sliders to 50%, the resulting brightness is 25%)

My Segments are gone after a reboot!

Segments are non-persistant by default. If you want to load your preset at every startup, just do the following:

  • Set your segments up as desired
  • Go into the Favorites tab in the web UI, click the save checkbox and save the config to preset slot number 16
  • In LED settings, set Boot Preset to 16

This will be improved in a future release, so that you will be able to save multiple segment configurations!

What is the difference between the WLED app and the WLED Native app?

The WLED app was the official app developped by the same people that brought you WLED. WLED Native is an initiative by community member Moustachauve to bring an interface that is closer to the native operating system look of your device and some new features.

The official WLED app is now considered legacy. It is not currently maintained and might not receive any future bug fixes.

WLED Native has a few more features available, like a tablet interface for Android and can keep track of changes to the device IP address better.

While WLED Native is not the official app, it is officially endorsed and trusted by the WLED maintainers.

May I sell a product running WLED?

WLED is licensed under the MIT license, thus you are free to use it in any way you wish as long as you retain the copyright notice and accept that I am not to be held liable for anything regarding your use of the software. For product pages, a link to the WLED GitHub repository would be hugely appreciated !

My question or solution is not on this page

Check out the WLED forum!

You can check out and use the WLED Discourse forum.

Look through the Issues

Maybe someone already reported your issue, so everybody supplying support would be grateful if you take some time to search through the existing issues.

If I report a new Issue, what do i need to share?

When you create a ticket, please share:

  • exact controller, maybe a link to the shop you bought it from
  • LED-strip type and amount of LEDs
  • Specifications of your power supply (max. current/voltage)
  • how you wired up all components (a diagram and/or picture often helps)
  • the BIN-file you tried to flash (version and file name) or your IDE version if compiling from source
  • Have you followed the quick start and compile settings at https://docs.wled.me?
  • Has it worked before?
  • Does it works without any LEDs connected? (for instance the controller just connected to your PC over USB)
  • Are you using/trying to use DHCP or static IP?
  • Did you try to use a mobile hotspot instead of your WLAN AP/home wifi?

Reason 1

If you use an external 5V power supply for your LEDs, please connect the GND of power supply, LEDs, and ESP. Otherwise, the LEDs can’t read the data signal from the ESP.

Reason 2

The ESP8266 is a 3.3V microcontroller while the WS2812B LED uses 5V. I have personally got away with this in most cases, but you should technically add a level shifter. A string of WS2811 did not work in one case (pure static white). A possible workaround is chaining a single WS2812B pixel in front and checking “Skip first LED” in the settings. My recommended levelshifter is the SN74AHCT125N, also used in the QuinLED Dig-Uno board. If you don’t have a level shifter, you can use this creative workaround.

Reason 3

Your data line can only be so long. Try out with less or thicker wire between your data pin on your controller and the LED strip, or add (see video) some voltage booster (which can make even 40m data wire length work ;-)).

Reason 4

If they don’t flicker, but display funny colors, try switching between RGB/RGBW modes in LED settings.

Not all my LEDs turn on

Reason 1

By default the LED count is set to 30. If you have more and can power them, go to LED settings and increase the LED count! Please also enter the milliamp rating of your 5v power supply for optimal brightness in the field below it. Do not increase the mA number if you power LEDs directly from the 5V pin of the ESP!

See here for maximum recommended LED counts.

Reason 2

An LED in your chain may be broken. Try another strip or removing the first LED that doesn’t light up. Make sure you are in solid effect mode and the LED count is set high enough first!

How to turn off the bright blue onboard LED?

This LED can be very distracting. Unfortunately it can’t easily be disabled as it shares the gpio2/D4 pin with the LED output.
It is turned off together with your LEDs (unless they require Off Refresh to be active)
Currently there are 3 workarounds:

  • Cover the LED
  • Remove the LED permanently (desolder or apply pressure with e.g. a flathead screwdriver)
  • Use a different LEDPIN, although the default is recommended for stable operation

Why is gpio2/D4 the default LED pin?

Although pins D1 and D2 are usually regarded the best GPIO pins to use in an ESP8266 project, D4 is the default in WLED, despite having two major and one minor drawback. The major drawbacks are the permanently lit blue onboard LEDs and the fact that the pin level needs to be high (pullup) at powerup or the controller will not boot. A minor drawback is that the Serial1 bus can not be used, but this is irrelevant in most cases, as the USB/serial converter is connected to the other Serial interface. The reason for using this pin is that it uses UART hardware driving, which increases stability and decreases CPU overhead especially with larger amounts of pixels.

Why can I only use 500 LEDs on the ESP8266 GPIO pin 3?

The problem is the DMA hardware driving method used on (just) that pin. It works well, but uses 4x (!) as much RAM memory as the UART hardware driving on pin 2 and the bitbang driver on all other pins.

What LED strip hardware is supported by WLED?

The compatible chipsets for the color-coding are

  • 1 pin:
  • WS2812B (5V)
  • WS2811 (12V power, with 5V signal)
  • WS2813 (WS2812 with redundant data on 2 wires DI and BI, to resist LEDs failure)
  • WS2815 (like WS2813 but 12V), send 5V signal on BI.
  • BTF2815 (cheaper 12V)
  • SK6813 (redundant like WS2813)
  • SK6812 (can support up to 4 colors, commonly GRBW)
  • SK6805 (3 colors)
  • 2 pins (clock CI and data DI) chips:
  • APA102
  • SK9822
  • WS2801 (uses gpio0 and 2)
  • LPD8806

Beside the digital addressable LED strips the good old analog LED strips are supported, too:

  • 4 pins: RGB
  • 5 pins: RGBW / RGBWW / RGBCW / RGBNW (RGB + one white channel)
  • 6 pins: RGBCT (RGB + 2 white channels) Note: Support is only for Alexa.

General Questions

What does the name WLED mean?

WiFi Lighting Effects Driver. Also it has LED in the name and is similar to the official term for WiFi, WLAN!

What do the WLED version names mean?

WLED version names are Japanese! Here is a nice list of their meanings:

Version Name Kanji Meaning
0.10 Namigai 浪貝 Geoduck (don’t google it!)
0.11.0 Mirai 未来 Future
0.11.1 Fumikiri 踏切 Railroad crossing
0.12 Hikari 光 Light
0.13 Toki 時 Time
0.14 Hoshi 星 Star
0.15 Kōsen 光線 Ray of light
N/A Kuuhaku 空白 Blank

What is the difference between the brightness sliders in the web UI?

There are three brightness slider types in the web UI. The white one in the top bar is the master brightness – it scales down every single color and all effects, palettes and segments by the same factor.

In contrast, the slider underneath the color wheel only applies to the currently selected color and will not affect the brightness of other colors or Palettes. It is recommended to use this slider only if you like a darker version of a color alongside other, brighter colors. It should not be used to control the overall brightness, so it is preferable to leave it on maximum and instead use the master brightness control.

There is a third brightness slider in each Segment panel. This serves the same purpose as master brightness, but limited to that segment. Please note that this does not override the master brightness, but instead is an additional downscaling. (If you set both Master and Segment brightness sliders to 50%, the resulting brightness is 25%)

My Segments are gone after a reboot!

Segments are non-persistant by default. If you want to load your preset at every startup, just do the following:

  • Set your segments up as desired
  • Go into the Favorites tab in the web UI, click the save checkbox and save the config to preset slot number 16
  • In LED settings, set Boot Preset to 16

This will be improved in a future release, so that you will be able to save multiple segment configurations!

What is the difference between the WLED app and the WLED Native app?

The WLED app was the official app developped by the same people that brought you WLED. WLED Native is an initiative by community member Moustachauve to bring an interface that is closer to the native operating system look of your device and some new features.

The official WLED app is now considered legacy. It is not currently maintained and might not receive any future bug fixes.

WLED Native has a few more features available, like a tablet interface for Android and can keep track of changes to the device IP address better.

While WLED Native is not the official app, it is officially endorsed and trusted by the WLED maintainers.

May I sell a product running WLED?

WLED is licensed under the MIT license, thus you are free to use it in any way you wish as long as you retain the copyright notice and accept that I am not to be held liable for anything regarding your use of the software. For product pages, a link to the WLED GitHub repository would be hugely appreciated !

My question or solution is not on this page

Check out the WLED forum!

You can check out and use the WLED Discourse forum.

Look through the Issues

Maybe someone already reported your issue, so everybody supplying support would be grateful if you take some time to search through the existing issues.

If I report a new Issue, what do i need to share?

When you create a ticket, please share:

  • exact controller, maybe a link to the shop you bought it from
  • LED-strip type and amount of LEDs
  • Specifications of your power supply (max. current/voltage)
  • how you wired up all components (a diagram and/or picture often helps)
  • the BIN-file you tried to flash (version and file name) or your IDE version if compiling from source
  • Have you followed the quick start and compile settings at https://docs.wled.me?
  • Has it worked before?
  • Does it works without any LEDs connected? (for instance the controller just connected to your PC over USB)
  • Are you using/trying to use DHCP or static IP?
  • Did you try to use a mobile hotspot instead of your WLAN AP/home wifi?

My LEDs don’t turn on at all.

Please make sure you have connected the strip to GPIO2 and it is sufficiently powered.

My LEDs don’t get as bright as they should!

If the brightness slider in the UI is already at maximum, try checking the auto brightness limiter in the LED settings. Set the milliamp limit to slightly below the rating of your power supply. If the LEDs are still too dim or change color towards the end of the strip, there may be a significant voltage drop. Try injecting 5v power at the end or middle of the strip with some appropriate cabling.

My LEDs are unable to be set into an consistent solid color

If the LEDs should be individually addressable, like the SK6812, but instead they only behave as either RED,GREEN OR BlUE pixels (in a row). You might not have enabled (settings -> led preferences) “LEDs are 4-channel type (RGBW)” for an RGBW/RGBWW/RGBNW strip. This behaviour is accompanied by WLED being unable to address all LEDs, if you specify the exact amount of LEDs in the strip.

When I select green, the LEDs turn red!

Depending on the type of LEDs used, Red and Green or other colors might be reversed. You can change the order in LED settings. WS2812B and most related chips use GRB, WS2811 uses RGB in most cases.

My LEDs act funny and flicker randomly

Reason 1

If you use an external 5V power supply for your LEDs, please connect the GND of power supply, LEDs, and ESP. Otherwise, the LEDs can’t read the data signal from the ESP.

Reason 2

The ESP8266 is a 3.3V microcontroller while the WS2812B LED uses 5V. I have personally got away with this in most cases, but you should technically add a level shifter. A string of WS2811 did not work in one case (pure static white). A possible workaround is chaining a single WS2812B pixel in front and checking “Skip first LED” in the settings. My recommended levelshifter is the SN74AHCT125N, also used in the QuinLED Dig-Uno board. If you don’t have a level shifter, you can use this creative workaround.

Reason 3

Your data line can only be so long. Try out with less or thicker wire between your data pin on your controller and the LED strip, or add (see video) some voltage booster (which can make even 40m data wire length work ;-)).

Reason 4

If they don’t flicker, but display funny colors, try switching between RGB/RGBW modes in LED settings.

Not all my LEDs turn on

Reason 1

By default the LED count is set to 30. If you have more and can power them, go to LED settings and increase the LED count! Please also enter the milliamp rating of your 5v power supply for optimal brightness in the field below it. Do not increase the mA number if you power LEDs directly from the 5V pin of the ESP!

See here for maximum recommended LED counts.

Reason 2

An LED in your chain may be broken. Try another strip or removing the first LED that doesn’t light up. Make sure you are in solid effect mode and the LED count is set high enough first!

How to turn off the bright blue onboard LED?

This LED can be very distracting. Unfortunately it can’t easily be disabled as it shares the gpio2/D4 pin with the LED output.
It is turned off together with your LEDs (unless they require Off Refresh to be active)
Currently there are 3 workarounds:

  • Cover the LED
  • Remove the LED permanently (desolder or apply pressure with e.g. a flathead screwdriver)
  • Use a different LEDPIN, although the default is recommended for stable operation

Why is gpio2/D4 the default LED pin?

Although pins D1 and D2 are usually regarded the best GPIO pins to use in an ESP8266 project, D4 is the default in WLED, despite having two major and one minor drawback. The major drawbacks are the permanently lit blue onboard LEDs and the fact that the pin level needs to be high (pullup) at powerup or the controller will not boot. A minor drawback is that the Serial1 bus can not be used, but this is irrelevant in most cases, as the USB/serial converter is connected to the other Serial interface. The reason for using this pin is that it uses UART hardware driving, which increases stability and decreases CPU overhead especially with larger amounts of pixels.

Why can I only use 500 LEDs on the ESP8266 GPIO pin 3?

The problem is the DMA hardware driving method used on (just) that pin. It works well, but uses 4x (!) as much RAM memory as the UART hardware driving on pin 2 and the bitbang driver on all other pins.

What LED strip hardware is supported by WLED?

The compatible chipsets for the color-coding are

  • 1 pin:
  • WS2812B (5V)
  • WS2811 (12V power, with 5V signal)
  • WS2813 (WS2812 with redundant data on 2 wires DI and BI, to resist LEDs failure)
  • WS2815 (like WS2813 but 12V), send 5V signal on BI.
  • BTF2815 (cheaper 12V)
  • SK6813 (redundant like WS2813)
  • SK6812 (can support up to 4 colors, commonly GRBW)
  • SK6805 (3 colors)
  • 2 pins (clock CI and data DI) chips:
  • APA102
  • SK9822
  • WS2801 (uses gpio0 and 2)
  • LPD8806

Beside the digital addressable LED strips the good old analog LED strips are supported, too:

  • 4 pins: RGB
  • 5 pins: RGBW / RGBWW / RGBCW / RGBNW (RGB + one white channel)
  • 6 pins: RGBCT (RGB + 2 white channels) Note: Support is only for Alexa.

General Questions

What does the name WLED mean?

WiFi Lighting Effects Driver. Also it has LED in the name and is similar to the official term for WiFi, WLAN!

What do the WLED version names mean?

WLED version names are Japanese! Here is a nice list of their meanings:

Version Name Kanji Meaning
0.10 Namigai 浪貝 Geoduck (don’t google it!)
0.11.0 Mirai 未来 Future
0.11.1 Fumikiri 踏切 Railroad crossing
0.12 Hikari 光 Light
0.13 Toki 時 Time
0.14 Hoshi 星 Star
0.15 Kōsen 光線 Ray of light
N/A Kuuhaku 空白 Blank

What is the difference between the brightness sliders in the web UI?

There are three brightness slider types in the web UI. The white one in the top bar is the master brightness – it scales down every single color and all effects, palettes and segments by the same factor.

In contrast, the slider underneath the color wheel only applies to the currently selected color and will not affect the brightness of other colors or Palettes. It is recommended to use this slider only if you like a darker version of a color alongside other, brighter colors. It should not be used to control the overall brightness, so it is preferable to leave it on maximum and instead use the master brightness control.

There is a third brightness slider in each Segment panel. This serves the same purpose as master brightness, but limited to that segment. Please note that this does not override the master brightness, but instead is an additional downscaling. (If you set both Master and Segment brightness sliders to 50%, the resulting brightness is 25%)

My Segments are gone after a reboot!

Segments are non-persistant by default. If you want to load your preset at every startup, just do the following:

  • Set your segments up as desired
  • Go into the Favorites tab in the web UI, click the save checkbox and save the config to preset slot number 16
  • In LED settings, set Boot Preset to 16

This will be improved in a future release, so that you will be able to save multiple segment configurations!

What is the difference between the WLED app and the WLED Native app?

The WLED app was the official app developped by the same people that brought you WLED. WLED Native is an initiative by community member Moustachauve to bring an interface that is closer to the native operating system look of your device and some new features.

The official WLED app is now considered legacy. It is not currently maintained and might not receive any future bug fixes.

WLED Native has a few more features available, like a tablet interface for Android and can keep track of changes to the device IP address better.

While WLED Native is not the official app, it is officially endorsed and trusted by the WLED maintainers.

May I sell a product running WLED?

WLED is licensed under the MIT license, thus you are free to use it in any way you wish as long as you retain the copyright notice and accept that I am not to be held liable for anything regarding your use of the software. For product pages, a link to the WLED GitHub repository would be hugely appreciated !

My question or solution is not on this page

Check out the WLED forum!

You can check out and use the WLED Discourse forum.

Look through the Issues

Maybe someone already reported your issue, so everybody supplying support would be grateful if you take some time to search through the existing issues.

If I report a new Issue, what do i need to share?

When you create a ticket, please share:

  • exact controller, maybe a link to the shop you bought it from
  • LED-strip type and amount of LEDs
  • Specifications of your power supply (max. current/voltage)
  • how you wired up all components (a diagram and/or picture often helps)
  • the BIN-file you tried to flash (version and file name) or your IDE version if compiling from source
  • Have you followed the quick start and compile settings at https://docs.wled.me?
  • Has it worked before?
  • Does it works without any LEDs connected? (for instance the controller just connected to your PC over USB)
  • Are you using/trying to use DHCP or static IP?
  • Did you try to use a mobile hotspot instead of your WLAN AP/home wifi?

My LEDs don’t turn on at all.

Please make sure you have connected the strip to GPIO2 and it is sufficiently powered.

My LEDs don’t get as bright as they should!

If the brightness slider in the UI is already at maximum, try checking the auto brightness limiter in the LED settings. Set the milliamp limit to slightly below the rating of your power supply. If the LEDs are still too dim or change color towards the end of the strip, there may be a significant voltage drop. Try injecting 5v power at the end or middle of the strip with some appropriate cabling.

My LEDs are unable to be set into an consistent solid color

If the LEDs should be individually addressable, like the SK6812, but instead they only behave as either RED,GREEN OR BlUE pixels (in a row). You might not have enabled (settings -> led preferences) “LEDs are 4-channel type (RGBW)” for an RGBW/RGBWW/RGBNW strip. This behaviour is accompanied by WLED being unable to address all LEDs, if you specify the exact amount of LEDs in the strip.

When I select green, the LEDs turn red!

Depending on the type of LEDs used, Red and Green or other colors might be reversed. You can change the order in LED settings. WS2812B and most related chips use GRB, WS2811 uses RGB in most cases.

My LEDs act funny and flicker randomly

Reason 1

If you use an external 5V power supply for your LEDs, please connect the GND of power supply, LEDs, and ESP. Otherwise, the LEDs can’t read the data signal from the ESP.

Reason 2

The ESP8266 is a 3.3V microcontroller while the WS2812B LED uses 5V. I have personally got away with this in most cases, but you should technically add a level shifter. A string of WS2811 did not work in one case (pure static white). A possible workaround is chaining a single WS2812B pixel in front and checking “Skip first LED” in the settings. My recommended levelshifter is the SN74AHCT125N, also used in the QuinLED Dig-Uno board. If you don’t have a level shifter, you can use this creative workaround.

Reason 3

Your data line can only be so long. Try out with less or thicker wire between your data pin on your controller and the LED strip, or add (see video) some voltage booster (which can make even 40m data wire length work ;-)).

Reason 4

If they don’t flicker, but display funny colors, try switching between RGB/RGBW modes in LED settings.

Not all my LEDs turn on

Reason 1

By default the LED count is set to 30. If you have more and can power them, go to LED settings and increase the LED count! Please also enter the milliamp rating of your 5v power supply for optimal brightness in the field below it. Do not increase the mA number if you power LEDs directly from the 5V pin of the ESP!

See here for maximum recommended LED counts.

Reason 2

An LED in your chain may be broken. Try another strip or removing the first LED that doesn’t light up. Make sure you are in solid effect mode and the LED count is set high enough first!

How to turn off the bright blue onboard LED?

This LED can be very distracting. Unfortunately it can’t easily be disabled as it shares the gpio2/D4 pin with the LED output.
It is turned off together with your LEDs (unless they require Off Refresh to be active)
Currently there are 3 workarounds:

  • Cover the LED
  • Remove the LED permanently (desolder or apply pressure with e.g. a flathead screwdriver)
  • Use a different LEDPIN, although the default is recommended for stable operation

Why is gpio2/D4 the default LED pin?

Although pins D1 and D2 are usually regarded the best GPIO pins to use in an ESP8266 project, D4 is the default in WLED, despite having two major and one minor drawback. The major drawbacks are the permanently lit blue onboard LEDs and the fact that the pin level needs to be high (pullup) at powerup or the controller will not boot. A minor drawback is that the Serial1 bus can not be used, but this is irrelevant in most cases, as the USB/serial converter is connected to the other Serial interface. The reason for using this pin is that it uses UART hardware driving, which increases stability and decreases CPU overhead especially with larger amounts of pixels.

Why can I only use 500 LEDs on the ESP8266 GPIO pin 3?

The problem is the DMA hardware driving method used on (just) that pin. It works well, but uses 4x (!) as much RAM memory as the UART hardware driving on pin 2 and the bitbang driver on all other pins.

What LED strip hardware is supported by WLED?

The compatible chipsets for the color-coding are

  • 1 pin:
  • WS2812B (5V)
  • WS2811 (12V power, with 5V signal)
  • WS2813 (WS2812 with redundant data on 2 wires DI and BI, to resist LEDs failure)
  • WS2815 (like WS2813 but 12V), send 5V signal on BI.
  • BTF2815 (cheaper 12V)
  • SK6813 (redundant like WS2813)
  • SK6812 (can support up to 4 colors, commonly GRBW)
  • SK6805 (3 colors)
  • 2 pins (clock CI and data DI) chips:
  • APA102
  • SK9822
  • WS2801 (uses gpio0 and 2)
  • LPD8806

Beside the digital addressable LED strips the good old analog LED strips are supported, too:

  • 4 pins: RGB
  • 5 pins: RGBW / RGBWW / RGBCW / RGBNW (RGB + one white channel)
  • 6 pins: RGBCT (RGB + 2 white channels) Note: Support is only for Alexa.

General Questions

What does the name WLED mean?

WiFi Lighting Effects Driver. Also it has LED in the name and is similar to the official term for WiFi, WLAN!

What do the WLED version names mean?

WLED version names are Japanese! Here is a nice list of their meanings:

Version Name Kanji Meaning
0.10 Namigai 浪貝 Geoduck (don’t google it!)
0.11.0 Mirai 未来 Future
0.11.1 Fumikiri 踏切 Railroad crossing
0.12 Hikari 光 Light
0.13 Toki 時 Time
0.14 Hoshi 星 Star
0.15 Kōsen 光線 Ray of light
N/A Kuuhaku 空白 Blank

What is the difference between the brightness sliders in the web UI?

There are three brightness slider types in the web UI. The white one in the top bar is the master brightness – it scales down every single color and all effects, palettes and segments by the same factor.

In contrast, the slider underneath the color wheel only applies to the currently selected color and will not affect the brightness of other colors or Palettes. It is recommended to use this slider only if you like a darker version of a color alongside other, brighter colors. It should not be used to control the overall brightness, so it is preferable to leave it on maximum and instead use the master brightness control.

There is a third brightness slider in each Segment panel. This serves the same purpose as master brightness, but limited to that segment. Please note that this does not override the master brightness, but instead is an additional downscaling. (If you set both Master and Segment brightness sliders to 50%, the resulting brightness is 25%)

My Segments are gone after a reboot!

Segments are non-persistant by default. If you want to load your preset at every startup, just do the following:

  • Set your segments up as desired
  • Go into the Favorites tab in the web UI, click the save checkbox and save the config to preset slot number 16
  • In LED settings, set Boot Preset to 16

This will be improved in a future release, so that you will be able to save multiple segment configurations!

What is the difference between the WLED app and the WLED Native app?

The WLED app was the official app developped by the same people that brought you WLED. WLED Native is an initiative by community member Moustachauve to bring an interface that is closer to the native operating system look of your device and some new features.

The official WLED app is now considered legacy. It is not currently maintained and might not receive any future bug fixes.

WLED Native has a few more features available, like a tablet interface for Android and can keep track of changes to the device IP address better.

While WLED Native is not the official app, it is officially endorsed and trusted by the WLED maintainers.

May I sell a product running WLED?

WLED is licensed under the MIT license, thus you are free to use it in any way you wish as long as you retain the copyright notice and accept that I am not to be held liable for anything regarding your use of the software. For product pages, a link to the WLED GitHub repository would be hugely appreciated !

My question or solution is not on this page

Check out the WLED forum!

You can check out and use the WLED Discourse forum.

Look through the Issues

Maybe someone already reported your issue, so everybody supplying support would be grateful if you take some time to search through the existing issues.

If I report a new Issue, what do i need to share?

When you create a ticket, please share:

  • exact controller, maybe a link to the shop you bought it from
  • LED-strip type and amount of LEDs
  • Specifications of your power supply (max. current/voltage)
  • how you wired up all components (a diagram and/or picture often helps)
  • the BIN-file you tried to flash (version and file name) or your IDE version if compiling from source
  • Have you followed the quick start and compile settings at https://docs.wled.me?
  • Has it worked before?
  • Does it works without any LEDs connected? (for instance the controller just connected to your PC over USB)
  • Are you using/trying to use DHCP or static IP?
  • Did you try to use a mobile hotspot instead of your WLAN AP/home wifi?
  • Quick Start WLED

  • Create A New Look

  • Selecting Presets

from the Clients

Concept Mock-Up Show Board